Play-Out Configuration
From WeizmannWiki
In this properties page, one can control the parameters that will affect the execution.
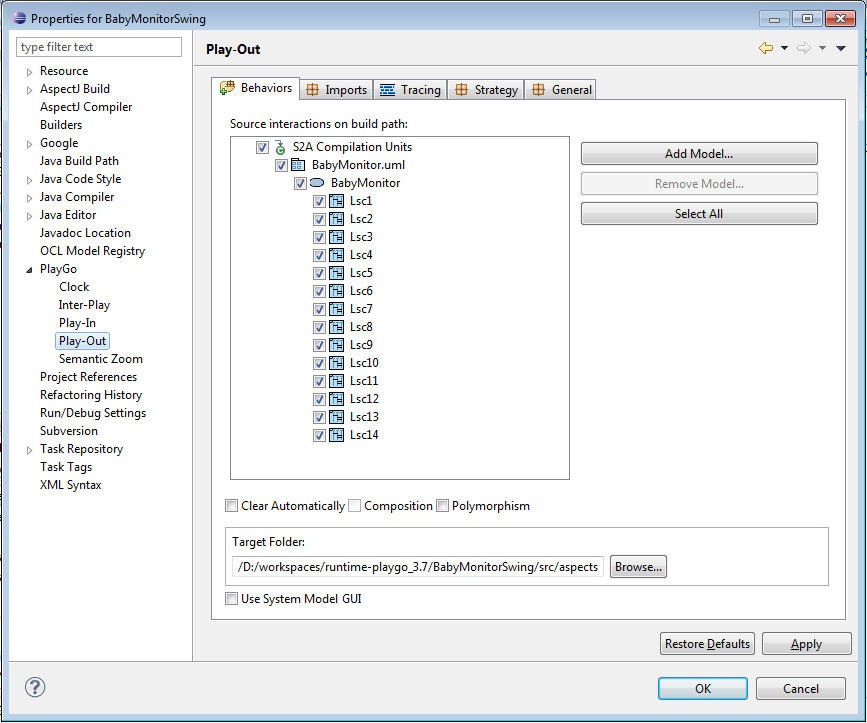
Right-click the project you work on and choose Properties->PlayGo->Play-Out:
As shown in the screenshot above, there are four tabs, in which you can configure properties related to S2A Builder:
Contents
Behaviors
- Source interactions on build path: Add and remove model files that you want to compile with S2A. For the models you add, you can choose which LSCs should be compiled by S2A. These are the ones that will participate in the system execution.
- Note that if no model is added, at runtime PlayGo will look for a model file in the project's root directory and will use it. If more than one such model file is found, PlayGo will not use any of them. Instead, when starting a play-out session, it will open the properties sheet and let the user chose the model file(s) to execute.
- One can choose to work with multiple model files (e.g., when each one serves as a different use case). This is done simply by adding all the files that participate in the run to the 'Source interactions on build path'. For more information about working with multiple model files click here.
- Clear Automatically: If on, cleans the aspects directory before generating aspects.
- Composition: Enable or disable composition.
- Polymorphism: Enable or disable polymorphism.
- Target Folder: Here you specify the directory in which the generated aspects will be located.
- Use System Model GUI: If selected, a default GUI will be generated and executed. The user can play the scenario from this GUI. Otherwise the user can provide his own GUI, or play out from the system model.
Imports
- Add and remove Java packages that will be imported in the generated aspects.
- Output package name: The package of the generated aspects.
Tracing
- Generate trace: Check if you want to generate a trace/log at runtime.
- Append: Check if you want to append the log to the existing one(rather than deleting and adding new content).
- Output file: The path and name of the generated trace file. By default, the trace file is generated in the root directory of your project.
- LSCs to trace: Check those LSCs you would like to trace. Check or uncheck the model root to apply your selection to all LSCs.
Strategy
Here you can choose a play-out strategy from a set of predefined strategies.
General
- Log4J configuration file: : Use for specifying the log4j configuration location.
- Debug: Use for specifying the port for debugging sessions
- Enable Trace Vis: Check if you want to generate a trace in the format that can be viewed via the TraceVis.
