Difference between revisions of "PlayGo"
From WeizmannWiki
| Line 12: | Line 12: | ||
Open the <PlayGo>/PlayGo.ini file and update the Java VM path to: <PlayGo>\ jre6\bin\ (e.g. D:\PlayGo\jre6\bin\). Alternatively, if you have Java 6 installed on your machine, simple remove the '-vm' parameter from the <PlayGo>\PlayGo.ini file. PlayGo will use your System properties to access your installed Java. | Open the <PlayGo>/PlayGo.ini file and update the Java VM path to: <PlayGo>\ jre6\bin\ (e.g. D:\PlayGo\jre6\bin\). Alternatively, if you have Java 6 installed on your machine, simple remove the '-vm' parameter from the <PlayGo>\PlayGo.ini file. PlayGo will use your System properties to access your installed Java. | ||
| − | + | === Run PlayGo with the Provided Workspace === | |
| + | |||
| Line 18: | Line 19: | ||
==== iii ==== | ==== iii ==== | ||
| − | |||
*[[Run PlayGo with the Provided Workspace]] | *[[Run PlayGo with the Provided Workspace]] | ||
*[[Create Your First LSC Project]] | *[[Create Your First LSC Project]] | ||
Revision as of 10:49, 3 September 2010
Contents
Getting Started with PlayGo
Install PlayGo
PlayGo is based on Eclipse and is packaged and provided as Eclipse Product. In addition to the product itself we provide a workspace with few examples.
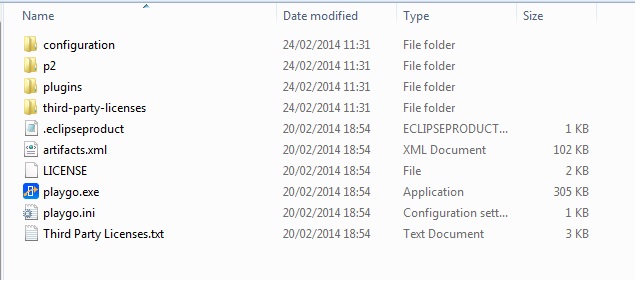
To install PlayGo, create a new directory and extract the PlayGo.zip file to that newly created directory. Throughout this document we will refer to this directory as <PlayGo>.
Once extracted, your <PlayGo> directory should have the following content:
JRE Configuration
Open the <PlayGo>/PlayGo.ini file and update the Java VM path to: <PlayGo>\ jre6\bin\ (e.g. D:\PlayGo\jre6\bin\). Alternatively, if you have Java 6 installed on your machine, simple remove the '-vm' parameter from the <PlayGo>\PlayGo.ini file. PlayGo will use your System properties to access your installed Java.
