How to define play-in-able Swing GUI application
Contents
Create a new LSC project
From PlayGo perspective: File-->New-->LSC Project
Write your Swing code
Using the WindowBuilder plugin
One possible option for creating the Swing GUI application is to use the WindowBuilder plugin. Follow these instructions:
- Use the System Model view to define the classes and objects that participate in your application, or to update existing ones as follows:
- Classes that have a GUI representation should extend one of the Swing available classes (JButton, JTextField, etc...).
- Classes that have a GUI representation should be marked as such (check the 'GUI' checkbox when creating the class).
- Create the application window using the WindowBuilder plugin.
- Right-click the package in which you want to create the application window. Select new->WindowBuilder\Swing designer\Application Window
- Click next and enter a name for the new Application Window
- Create a GUI representation of the objects you previously created in the system model.
- Select the “Design” tab in the newly created Application Window.
- Use the “Choose Component” tool from the palette to choose the Class which object you’d like to represent in GUI. Once done, this object is added to the 'custom' section at the bottom of the palette.
- Click on the Swing JFrame to add the component in the desired location.
- In the properties view of the newly created component, change the Constructor->name property to the name of the object as was given to it in the System Model (since the System Model object and the GUI component are actually the same object).
- Repeat 2-4 above for all the objects you want to include in your GUI, and design it to your preferred look.
Manually writing Java Swing code
- You can choose to write the GUI in pure Java Swing code.
- Once the code is complete, use the import button from the System Model view to create a System Model from the Java Code.
Make your GUI play-in-able
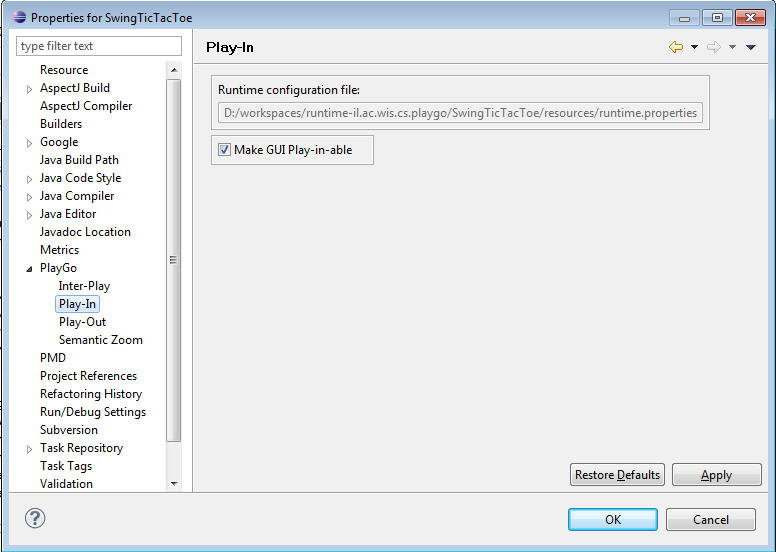
Right-click your LSC project-->Properties-->PlayGo-->Play-In. Check the "Make GUI Play-in-able" check box:
All public methods that are defined in your component's class will appear in the component's right-click menu during play-in. If you wish to omit one of the methods, do the following:
1. Add import il.ac.wis.cs.gwt.server.stubs.annotation.NonPlayInable; to your class
2. Add the @NonPlayInable annotation before the method you'd like to omit
Supported Swing components and component's default action
All Swing components that are made play-in-able once clicking the "Make GUI play-in-able" check box, are defined in the swingComponents hash table under il.ac.wis.cs.automateplayin.GUIComponents.java in the guitoolkit project.
The components are added along with their event listeners and their default action.
For example, JButton is added to the hash table as follows:
swingComponents.put(Constants.JBUTTON, new String[]{Constants.ACTION_LISTENER,Constants.CLICK_ACTION});
Components that have no default action are added with no listener and default action; e.g., JLable is added as follows: swingComponents.put(Constants.JLABEL, new String[]{"",""});
Currently, the supported event listeners are Action Listener and Change Listener.
Binding expressions for dynamic instances
1. In order to be able to create a binding expression for an instance in Play-Out, each Dynamic instance should have the following code:
public class BindedButton extends JButton{


 static HashMap<String, BindedButton> allButtons= new HashMap<String, BindedButton>();


 public BindedButton(String name) {
      super();
      this.name = name;
      allButtons.put(name, this);
  }


...


 public static BindedButton getButton(String buttonName)
 {
     BindedButton button = allButtons.get(buttonName);
     return button;
 }
}
You are now ready to start playing in.
Watch a Demo
