Getting Started with PlayGo
Contents
Install PlayGo
PlayGo is based on Eclipse and is packaged and provided as an Eclipse Product. In addition to the product itself, we provide a workspace with several examples.
To install PlayGo, create a new directory and extract the downloaded zip files to that newly created directory. Throughout this document we refer to this directory as <PlayGo>.
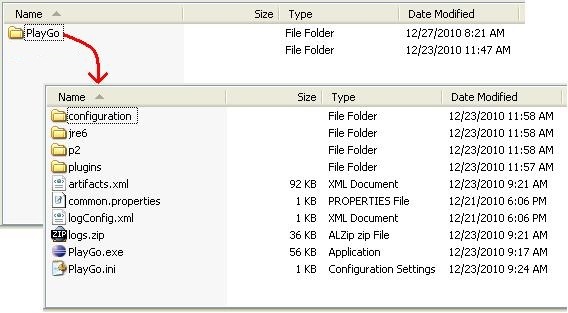
Once extracted, your <PlayGo> directory should have the following content:
Run PlayGo with the provided workspace
Startup PlayGo
To start PlayGo, go to your <PlayGo>/playgo/ directory and double-click the PlayGo.exe file. As it is in Eclipse, PlayGo will ask you for the workspace to start with. Create a new workspace, or choose the workspace provided with the installation (i.e., <PlayGo>/workspace/).
The <PlayGo>/workspace/ contains four projects:
- ATM – example for ATM System. The ATM GUI side is based on GWT. ATM behavior was modeled by playing in a set of scenarios. S2A is used for generating aspects, which are used to monitor and run the system (play-out).
- BabyMonitor – Another example system. The GUI side is based on Swing. Its behavior was modeled by playing in a set of scenarios. S2A is used for generating aspects, which are used to monitor and run the system (play-out).
- GWTMemoryGame – Another example system. The Memory Game GUI side is based on GWT. Its behavior was modeled by playing in a set of scenarios. S2A is used for generating aspects, which are used to monitor and run the system (play-out).
- il.ac.wis.cs.common – a library that contains a few examples of creating LSC models using Java API.
We will refer to these projects in the following sections.
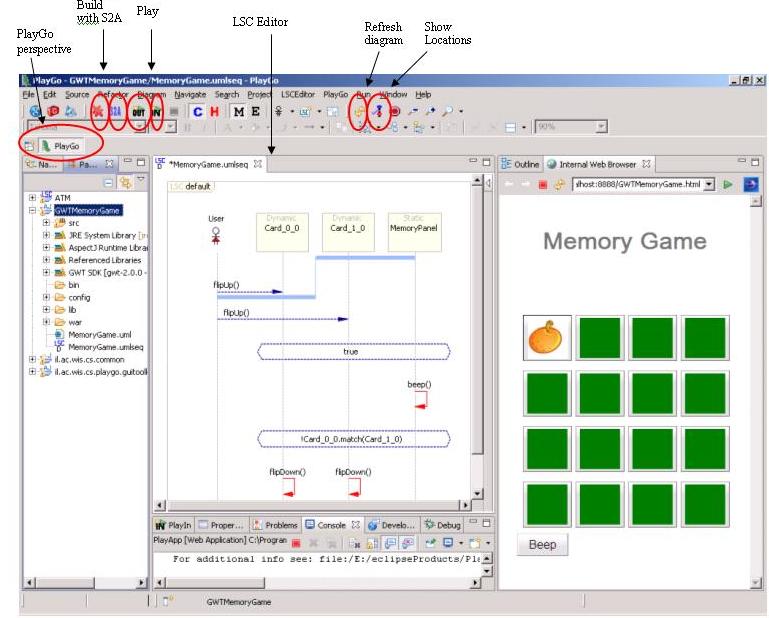
Once PlayGo is open, note that the PlayGo perspective is selected. It is recommended to use this perspective, as it provides some shortcuts.
Configure the examples
Since some of our examples are based on GWT, you should configure the GWT settings before you can run the examples:
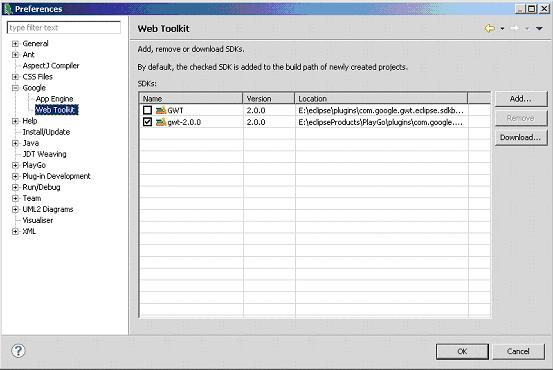
1. From Window menu, choose Preferences->Google->Web Toolkit. Configure it to point to your <PlayGo>\plugins\com.google.gwt.eclipse.sdkbundle.2.0.0_2.0.0.v200912062003\gwt-2.0.0 directory:
2.From Window menu, choose Preferences->Google->App Engine. Configure it to point to your <PlayGo>\plugins\com.google.appengine.eclipse.sdkbundle.1.3.0_1.3.0.v200912141120\appengine-java-sdk-1.3.0 directory:
Start playing
Run the examples: play-out
The examples provided are configured and ready to be played out. Aspects are already generated and Java-compiled. To play out, select an example project (e.g., GWTMemoryGame) and click the 'Play-Out' button on the toolbar. As a result, the application will start (if this is a GWT application, the corresponding GWT application will start and its URL will be copied to the Eclipse Internal Web Browser) and the LSC specification will be open in the LSC editor. You can now start working with the application. For example: flip up cards in a memory game, and see how the application works, with the cut changing on the LSC diagram.
To stop playing out, click the 'Stop' button on the toolbar, next to the 'Play-Out' and 'Play-In' buttons.
If the example fails to run, check out our troubleshoot section.
Debug
When playing out an example, it is executed in debug mode. Thus, you see the LSC diagram at runtime with additional debugging information, such as the cut: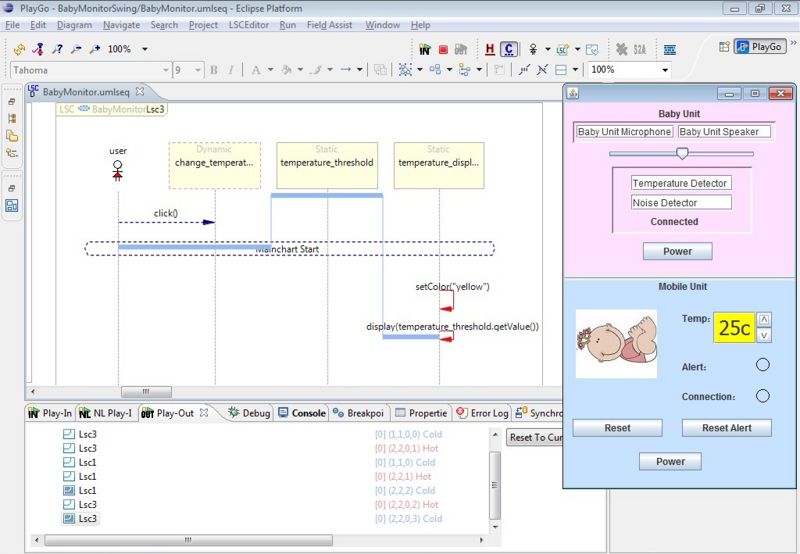
You can right-click a message and toggle a Breakpoint. The LSC debugger will stop on breakpoint. To continue, choose Resume from the Debug View.
Enrich the examples with scenarios: play-in
For playing in, select an example project (e.g. BabyMonitor) and click the 'Play-In' button on the toolbar. As a result, the play-in server starts and the application starts (if this is a GWT-based application, i.e., GWTMemoryGame, the corresponding GWT application starts and its URL is copied to the Eclipse Internal Web Browser).
You can now start playing in.
Create your First LSC Project
Creating a new LSC project is done from the file menu: choose New --> LSC Project. Note: if you're not using the PlayGo perspective you may not see this option, in which case choose New --> Other --> PlayGo category --> LSC Project. Keep the flags checked, as follows:
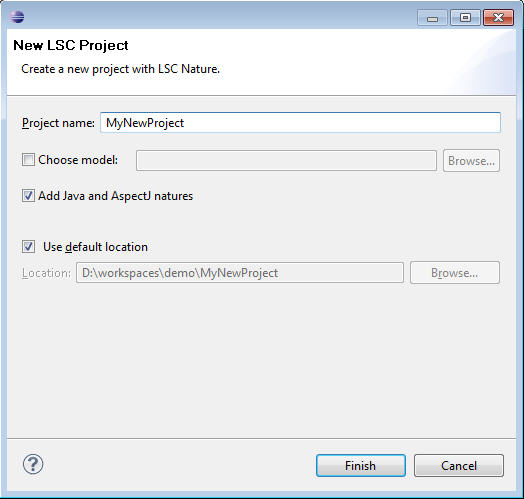
You can now start working on your system. Refer to How to define play-in-able Swing GUI application for step by step instructions on defining an LSC application with a GUI.
